Our microcontroller kits are designed to be powerful and flexible, allowing you to complete cool
electronics projects and to learn electronics.
They are based around an Atmel
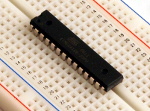
ATmega168 series microcontroller (MCU). These are powerful, industrial grade
MCUs, and we help you build a full system around them. This microcontroller has a CPU, permanent
storage (flash memory), temporary storage (static RAM), and inputs and
outputs.
The most significant feature which sets us apart from other kits is that we
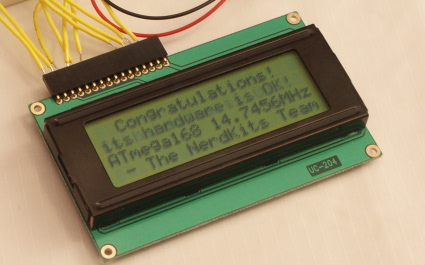
include a LCD screen with your kit, capable of displaying 80 characters (4 rows with 20 characters on each).
For any projects that require a person to interact with the circuit, an LCD
screen is an essential device. Typical development kits (targeted at full-time
electrical engineers, not beginners who need more guidance) often charge
significantly more to include LCDs.
"Anyone looking to try their hand at microcontrollers should definitely stick to the kit that's simple, yet has unlimited potential: a NerdKit. The instructions are in an easy to read format and there is sufficient background information that anyone with a basic understanding of electronics can construct a basic microcontroller circuit and add features from there. I definitely suggest this product whether it's your first microcontroller or a prototype for your latest creation.
NerdKits Rule!!!"
-Carl R.
Phillips, WI
The USB NerdKit includes:
- Our Official NerdKits Guide, a PDF book which contains step-by-step
information on how to build the kit, plus actual explanation of why you're
being told to perform each step. The book contains lots of color photos and
screenshots, and addresses the electrical setup, the software setup, the C
programming language, and
walks you through writing, compiling, and running your very first
microcontroller program. This is the core of the instructional material,
and the educational value contained within will help ease you past the
typical roadblocks and on your way to success. If you're looking to learn electronics,
this is the way to start.
- One Atmel AVR ATmega168 microcontroller. This includes the CPU, flash
memory, and RAM. This is a powerful chip and allows for great
flexibility in your projects -- just see the incredible diversity of our video tutorials built around this one chip!
- One USB programming cable.
We use a USB programming cable to get you from your computer to your circuit.
Additionally, you can use the USB cable to communicate between your microcontroller
and programs running on your PC, which allows for a whole new dimension of possible
projects!
- One LCD screen, 4 lines by 20 characters wide. The LCDs also
have a yellow backlight, so when powered with a wall DC adapter (not included), they
can be read in the dark.
- One solderless breadboard with 30 connection rows. While it's
more expensive than a normal
printed circuit board, a solderless breadboard allows you to modify your
design and build new projects quickly, and keeps you away from high
temperatures which could damage you or your parts.
- Our sample code, which helps those of you who can learn most quickly
by seeing examples of working software. This includes commented code
showing how to use the LCD, the analog-to-digital converter, and other
features of the NerdKit. Starting from a working code template lets you
avoid issues with setting up your compiler and programming tools and lets
you get down to business.
- One 9V battery and connector. Using a standard 9V battery, your kit can
run for about ten hours, or even longer if using the AVR's sleep modes.
You're welcome to replace the battery with a wall-powered adapter if you decide
you don't need the flexibility of having your circuit work away from an
outlet.
- One voltage regulator. The microcontroller requires a clean, consistent
power supply. A chip to provide this is included.
- One temperature sensor. We give you a high-quality,
integrated-circuit temperature sensor (LM34), which is already calibrated and will
teach you about measuring things in the real world, and working with analog
to digital conversion.
- Two red LEDs
- Two yellow LEDs
- Two green LEDs
- One pushbutton. Nice click action.
- Two SPDT switches, good as general purpose switches.
- One 7-bit-wide DIP switch, which is just a collection of small
switches in one package, useful for setting input values without
reprogramming.
- One piezoelectric buzzer, which allows you to make music in software by using it as a speaker,
or respond to sounds by using it as a microphone.
- Four 2N7000 MOSFETs, which are transistors you can use to allow your microcontroller to control larger loads.
- Wire, resistors, etc. The small things that connect everything
together.
"Two days ago I received the USB NerdKit in the mail and completed the fantastically informative guide within a few hours with no problems. I want to start by saying that out of all the MCU kits I've worked with (3 or 4) the NerdKit is by far the most useful, helfpul and fun kit I've ever had. I learned more from this than any of the others combined. You guys are doing something wonderous here and I can't thank you enough."
-Caleb M.
Yakima, WA
In addition, there are plenty of sensors and actuators that we don't include
but are easy to find (from old electronics "junk", or even at your
local Radio Shack) and are easy to add to the kit. Examples include:
- DC motors like you'd find in R/C toys. (Our microcontrollers have
a built-in PWM output for smoothly controlling the speed of motors like
these -- see our Motors and Microcontrollers 101
video tutorial!)
- Stepper motors, which rotate to a given position, rather than
spinning continuously under applied power.
- Relays, which allow your microcontroller to turn big-power items
on and off.
- Speakers and buzzers, which provide another way for your
microcontroller code to tell the user that it needs attention.
- Light sensors, which might be used just to tell how bright/dark
it is, or might be used in more interesting ways to actually send
information over light!
"I recently bought a USB nerdkit. VERY CLEAR instructions!
Great kit! I was going to buy a basic2 starter kit, but for 1/2 the price I probably learned twice as much. I'll keep watching to see what projects might pop up at your site."
-John C.
Schuylkill Haven, PA
Many times, we are asked, "Where do I go from here?" Our favorite answer is, "Wherever you want!", but here are some specific suggestions:
Check out our video tutorials. We spend a lot of our time bringing you new and exciting projects you can do with a NerdKit. Usually our projects will show off a particular piece of functionality of the chip like interrupts, or emphasize some higher level concept like first order systems. Take time to watch a few, as they introduce a wide range of topics and projects.
The LED Array Kit: NerdKits also offers an expansion kit for the NerdKit, the LED Array Kit. This kit allows you to build a 5x24 pixel LED Array that can scroll personalized messages. The array is controlled by the NerdKit and offers a great project to dive deeper into MCU programming. Learn more about the LED Array Kit....
We expect that you have the following things in order to use our kit:
- Computer.
The compiler software and toolchain (built around "avr-gcc", open-source) is compatible with Windows, Mac OS X, and Linux,
and we take special care to make sure our tools work equivalently on all three operating system platforms.
- Wire strippers.
If you don't have wire strippers already, your local hardware store will, or you can find some
online.
While not required, a multimeter
can be very handy for debugging your circuits. You might already have one,
but if not, we have a few in our store.
Take a look at our store!

